Modern AppKit File Permissions
Sandboxing has been a fact of macOS development for quite some time now. With each release of macOS we see an increasing number of features and new security constraints that we must live with.
This is great for consumers, but (as with most things Security) can be a pain in the neck for developers.
I decided to start building a little utility app to stitch together some scripts that I use to publish NSScreencast. This is largely for my own education, and gives me an excuse to do more AppKit development.
My first task was to just list the episodes from a folder on my local machine in a tableview. The data for this would come from FileManager , so I could just list the contents of my directory, right? Right?
let url = URL(fileURLWithPath: "/path/to/folder")
try FileManager.default.contentsOfDirectory(at: url,
    includingPropertiesForKeys: nil,
    options: .skipsHiddenFiles) // permissions error
Wrong.
This code fails with an error indicating you don’t have permission to the folder.
A sandboxed macOS app doesn’t have access to the entire file system. Instead, apps have to be granted permission to read & write to specific folders.
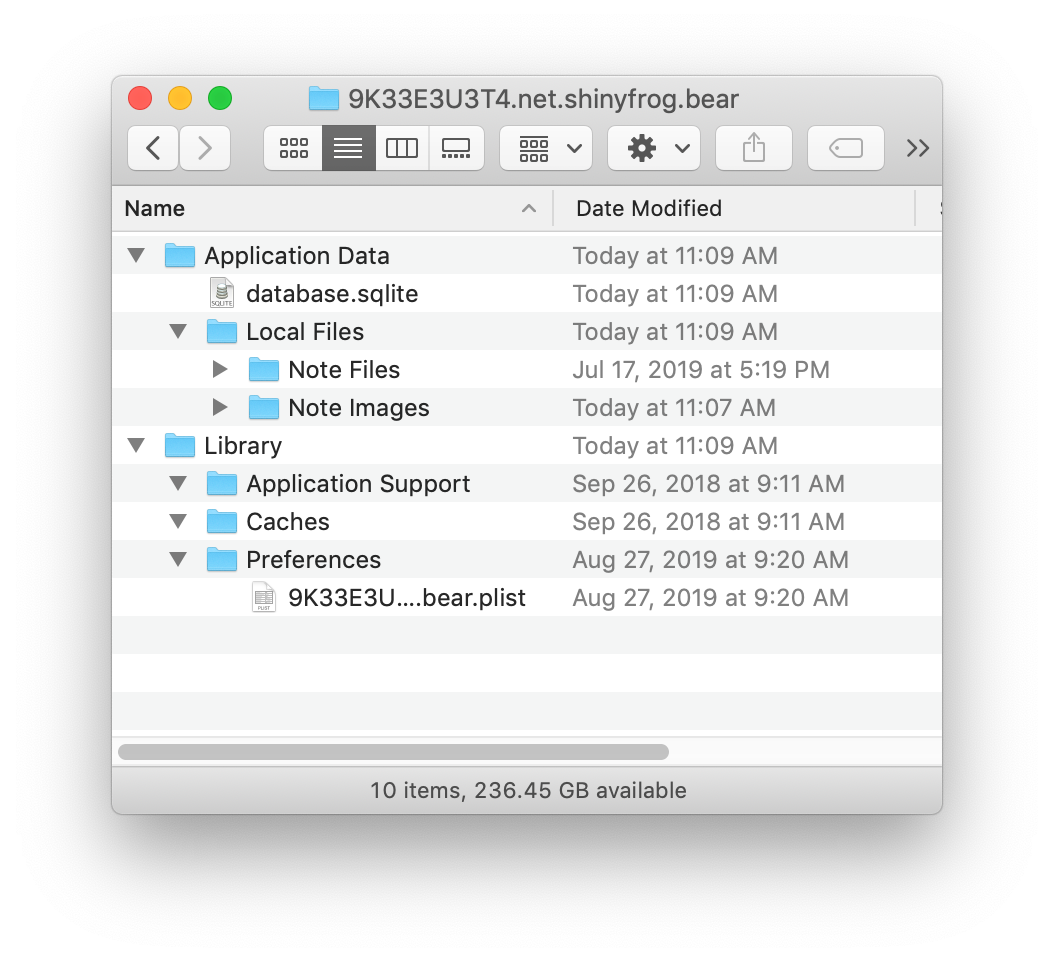
This isn’t true for your sandbox of course. Each app is given an isolated place to store data, documents, cache, and settings. But in this case I want to read files outside of my sandbox. For this I’ll need user permission.
So I need to somehow get access to a folder outside my sandbox.
Granting Permission to Access Folders
There is no API for saying “Please prompt the user to access this folder”. Instead, this is done in one of three ways:
- Full Disk Access
- Prompting the user to open a file/directory
- Dragging & Dropping a folder onto the application
Of course you could also turn off Sandboxing altogether and not deal with this stuff. Doing so, however, means you would not be able to distribute your app on the Mac App Store. I personally don’t have this requirement, but I’m also stubborn and wanted to know how to do this stuff, so here we are.
Full Disk Access
There is of course the option to use Full Disk Access, but this is a sledgehammer, and isn’t appropriate for most applications. If you do need Full Disk Access, this would require opening the Security preference pane, going into Full Disk Access, unlocking the UI, and dragging the app into this list.
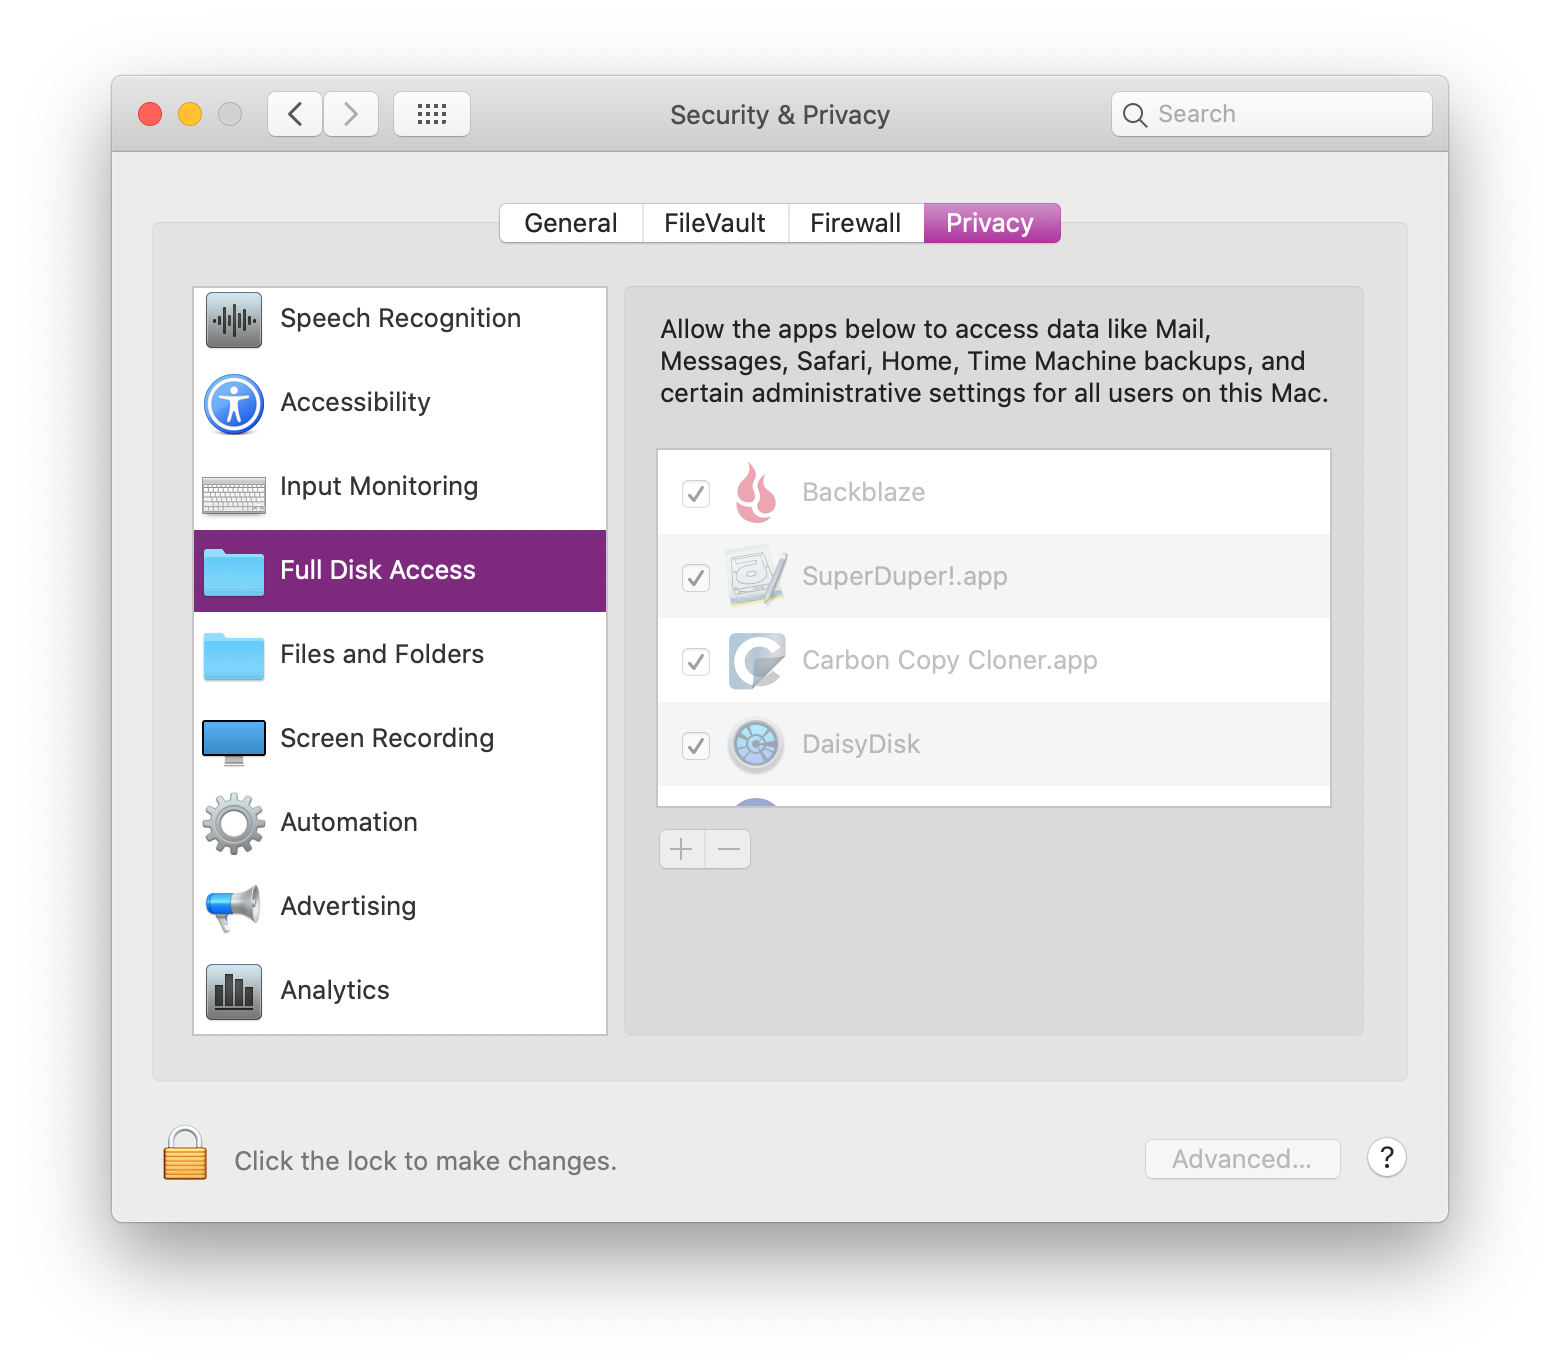
Users will need assistance doing this, so I’ve noticed that many apps have their own way of prompting and instructing the user how to do this dance.
To top it off, the user has to quit the app and relaunch for the app to see these new permissions.
Fine Grained Permissions with NSOpenPanel
In our case we want permission to read (and write) to a single folder that is outside of our app’s sandbox. We’l need to enable this ability.
First, click on your project in the navigator on the left, then click “Signing & Capabilities”. Here you can manage a few common options when dealing with Sandboxing. Look for File Access - User Selected File and change this to Read/Write. This will give you a new entitlement in your entitlements file.
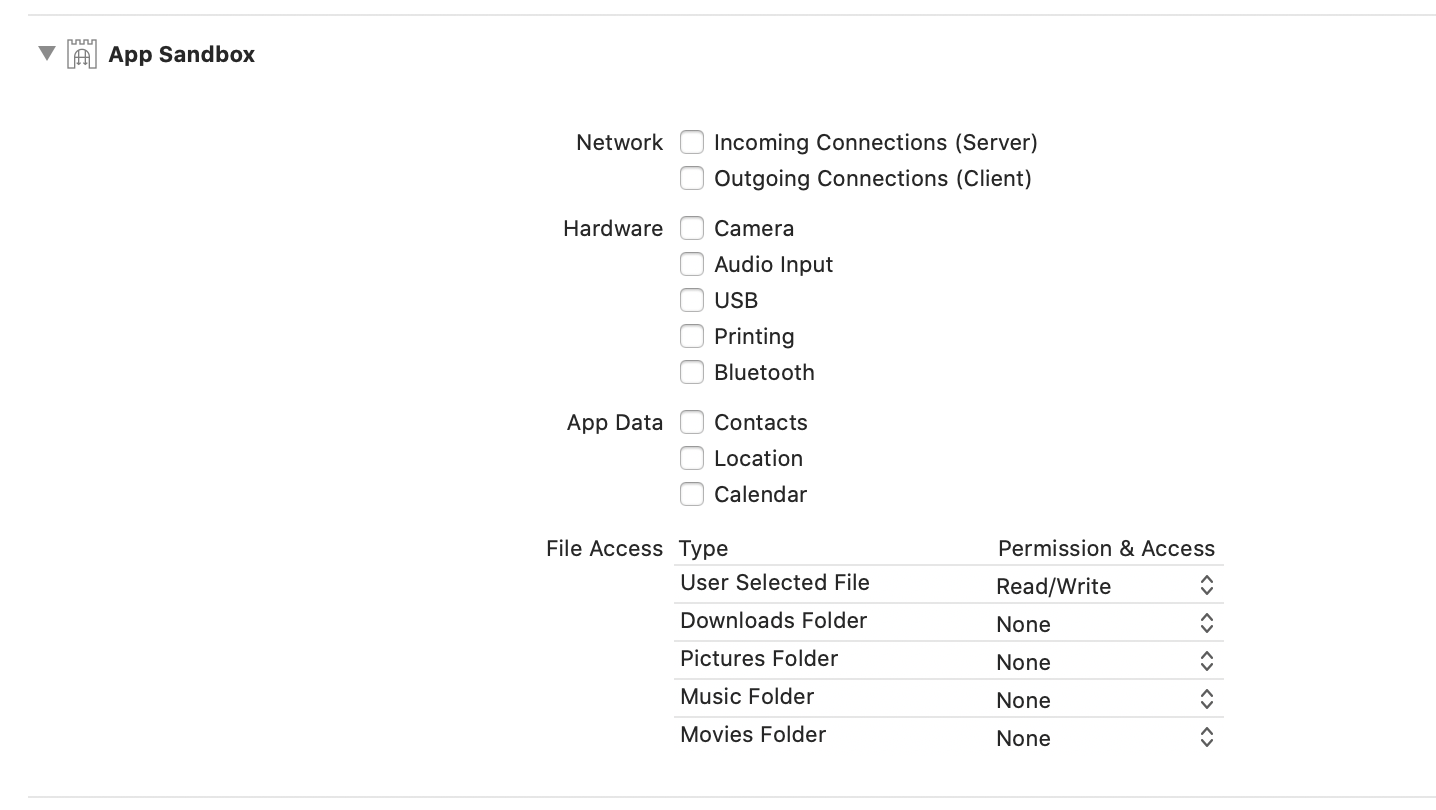
If you only wanted to write to one of the blessed locations listed above, then you don’t need to do this step, just set the appropriate permission level and you can access that folder.
For the User Selected File case, we have to show user intent. Here we’ll pop a panel to “open the directory”, which will signal to the OS this intent:
private func promptForWorkingDirectoryPermission() -> URL? {
    let openPanel = NSOpenPanel()
    openPanel.message = "Choose your directory"
    openPanel.prompt = "Choose"
    openPanel.allowedFileTypes = ["none"]
    openPanel.allowsOtherFileTypes = false
    openPanel.canChooseFiles = false
    openPanel.canChooseDirectories = true

    let response = openPanel.runModal()
    print(openPanel.urls) // this contains the chosen folder
    return openPanel.urls.first
}
If we use the URL instance that we get from the above function, we can pass this to FileManager to list the contents of the directory.
One caveat though: this access will expire when the user quits the app. Ugh.
Drag & Drop
Another way of signaling intent is to have the user drag & drop the folder to your app. To do this, you’ll have to go through the dance which will allow your app to accept a drag.
In my case I created a custom DragHandlingView and associated delegate to pass this information off to a controller:
protocol DragDelegate : class {
    func handleDrag(from view: DragHandlingView, dragInfo: NSDraggingInfo) -> Bool
}

class DragHandlingView: NSView {
    weak var delegate: DragDelegate?

    override func draggingEntered(_ sender: NSDraggingInfo) -> NSDragOperation {
        return .generic // this controls what the icon does ("copy", "move", "link", etc)
    }

    override func performDragOperation(_ sender: NSDraggingInfo) -> Bool {
        return delegate?.handleDrag(from: self, dragInfo: sender) ?? false
    }
}
Then in my controller, I request permission for the drag types I want to accept:
class WorkingDirectoryPromptViewController: NSViewController, DragDelegate {
    override func viewDidLoad() {
        super.viewDidLoad()
        registerForDragDrop()
    }

    private func registerForDragDrop() {
        (view as! DragHandlingView).delegate = self

        // we don't need file contents, just the location
        view.registerForDraggedTypes([.fileURL])
    }

    // ...
}
Then we can handle the drag:
Armed with these two methods, you now have a couple ways to be given a special URL that has access to the folder the user selects.
func handleDrag(from view: DragHandlingView, dragInfo: NSDraggingInfo) -> Bool {
    // the dragInfo contains a "pasteboard" with our data
    if let fileURL = NSURL(from: dragInfo.draggingPasteboard) as URL? {
        print("FILE: \(fileURL)")
        var isDir: ObjCBool = false
        _ = FileManager.default.fileExists(atPath: fileURL.path, isDirectory: &isDir)

        if !isDir.boolValue {
            let alert = NSAlert()
            alert.alertStyle = .warning
            alert.messageText = "Drag a folder instead."
            alert.runModal()
            return false
        } else {
            workingDirectoryChosen(fileURL)
        }
    }
    return true
}
Persistent Access to a Folder
By default the approaches above grant you access while the app remains open. When you quit the app, any folder access you had is lost.
To gain persistent access to a folder even on subsequent launches, we’ll have to take advantage of a system called Security-Scoped Bookmarks.
It is helpful to read the docs on this, as there is little information elsewhere on the web about this (hence this article).
To start we’ll need to add an entitlement to MyApp.entitlements:
<key>com.apple.security.files.bookmarks.app-scope</key>
<true/>
Next, after you’ve been granted permission to a folder using one of the methods above, we need to create a bookmark to that folder with a a special flag:
private func saveBookmarkData(for workDir: URL) {
    do {
        let bookmarkData = try workDir.bookmarkData(options: .withSecurityScope, includingResourceValuesForKeys: nil, relativeTo: nil)

        // save in UserDefaults
        Preferences.workingDirectoryBookmark = bookmarkData
    } catch {
        print("Failed to save bookmark data for \(workDir)", error)
    }
}
On a subsequent launch we can check for the existence of this data and try to load the URL back (preserving its permissions):
private func restoreFileAccess(with bookmarkData: Data) -> URL? {
    do {
        var isStale = false
        let url = try URL(resolvingBookmarkData: bookmarkData, options: .withSecurityScope, relativeTo: nil, bookmarkDataIsStale: &isStale)
        if isStale {
            // bookmarks could become stale as the OS changes
            print("Bookmark is stale, need to save a new one... ")
            saveBookmarkData(for: url)
        }
        return url
    } catch {
        print("Error resolving bookmark:", error)
        return nil
    }
}
With these approaches you should now have access to the folder even across app launches.
But there’s one more step! We have to tell the system when we want to use the “resource” and when we’re done.
Start / Stop Requesting Access
When we’re ready to read files, we’ll have to wrap this in a pair of calls to signal that we want to access the resource:
if !workingDir.startAccessingSecurityScopedResource() {
    print("startAccessingSecurityScopedResource returned false. This directory might not need it, or this URL might not be a security scoped URL, or maybe something's wrong?")
}

paths = try FileManager.default.contentsOfDirectory(at: workingDir, includingPropertiesForKeys: nil, options: .skipsHiddenFiles)
            .map {
                $0.relativePath.replacingOccurrences(of: workingDir.path, with: "")
            }
workingDir.stopAccessingSecurityScopedResource()
Here we call startAccessingSecurityScopedResource on the URL we’ve been given. This might return false under a few conditions:
- The user really doesn’t have access to this
- The URL isn’t a security scoped URL
- This directory doesn’t need it (remember
~/Downloads, etc above?)
So we’re just logging this value and continuing anyway. We might still get an error when accessing the contentsOfDirectory and we’ll have to handle that by prompting for access again.
Some Gotchas
In working through this issue I ran into numerous gotchas.
- Watch out for symlinks. My working directory is full of them, and I wanted to list contents of a nested folder that was actually a symlink, and this doesn’t work. You have to grant permissions to the real folder, which may involve additional prompts to grant all the permissions you need.
- Watch out for folders that already have access. Even though we’re prompting for access, the user might select
~/Downloadsor~/Picturesor something. This will work fine, but you might run into confusion whenstartAccessingSecurityScopedResourcereturnsfalse. In these cases we can just continue. - Watch out for Dropbox and other filesystem-bending plugins. Dropbox does some useful but unholy things to Finder and the file system in order to do its job. This might result in strange behavior when trying to access those files & folders.
Special Thanks
I want to thank to Daniel Jalkut, Daniel Kennett, and Chris Liscio for their invaluable help shedding some light on this. Also thanks to Jeff Johnson for noting the security scoped bookmark entitlement is no longer needed.